TATTOO SHADING · VALUES · BEGINNER GUIDE
How to Shade a Tattoo: A Beginner’s Guide
Learning how to shade is one thing. Knowing where to shade is another.
When beginners start learning tattoo shading, the first questions are usually technical.
- What needle should I use?
- How fast should my hand move?
- What grey wash should I choose?
- How should I set up my machine?
Those things matter.
But before any of them, there is another question:
Where should the shading actually go?
Before you decide how to create a smooth gradient, you need to understand the structure of the image.
Where are the darkest values?
Where are the midtones?
Where should the image stay light?
And which areas should remain open skin?
If those decisions are unclear, technique alone cannot solve the problem.
That is why tattoo shading starts before the needle touches the skin.
Tattoo Shading Starts Before the Needle Touches the Skin
My background started in art before tattooing.
For centuries, painters and draftsmen have simplified complex subjects into larger masses of light and shadow before refining details.
The details came later.
The masterpiece came later. The structure came first.
When I began tattooing, I naturally tried to approach the skin in a similar way.
Build the large masses first.
Return to them.
Refine them.
Return again.
Refine again.
On a canvas, that process works extremely well.
Skin is different.
Repeated passes over the same area can increase working time and may increase the risk of overworking the tissue.
Eventually I understood something important.
The principle wasn’t wrong. The timing was wrong.
The large visual decisions still have to come first.
But in tattooing, many of them should be made before the machine is switched on.
After almost four decades of tattooing, I consider this one of the most important parts of shading preparation.
Before You Shade, Identify the Value Structure
Look at your reference before thinking about technique.
Try to identify the major tonal areas.
At the simplest level, look for:
- darkest values
- deep shadows
- midtones
- lighter transitions
- highlights
- open skin
You are not trying to turn the image into a mathematical formula.
You are trying to make the visual decisions easier to see.
Once those decisions are separated, the image becomes much easier to understand.
The LATERAL Value Framework
Inside LATERAL, I use a simple value framework:
SKIN → 20 → 40 → 60 → 80 → 100
- SKIN
- Areas intentionally left open.
- 20
- Very light tonal information.
- 40
- Light-to-mid values.
- 60
- Mid values.
- 80
- Deep values.
- 100
- The darkest mass or solid black.
The numbers are not the important part.
The separation is.
The purpose is to make each tonal decision visible before execution begins.
Where Does the Tattoo Shading Actually Go?
A beginner will often look at a reference and ask:
“How do I shade this?”
Sometimes the better question is:
“Where does the shading belong?”
Before choosing a needle or grey wash, try to identify:
- where the deepest darks sit
- where forms turn away from the light
- where the image needs contrast
- where depth needs to increase
- where the eye needs visual rest
- which areas should remain open skin
Technique determines how you create the value.
Structure determines where that value belongs.
Those are two different problems.
Deconstructing a Real Tattoo
Sometimes the easiest way to understand how a tattoo was built is to take the finished tattoo apart.
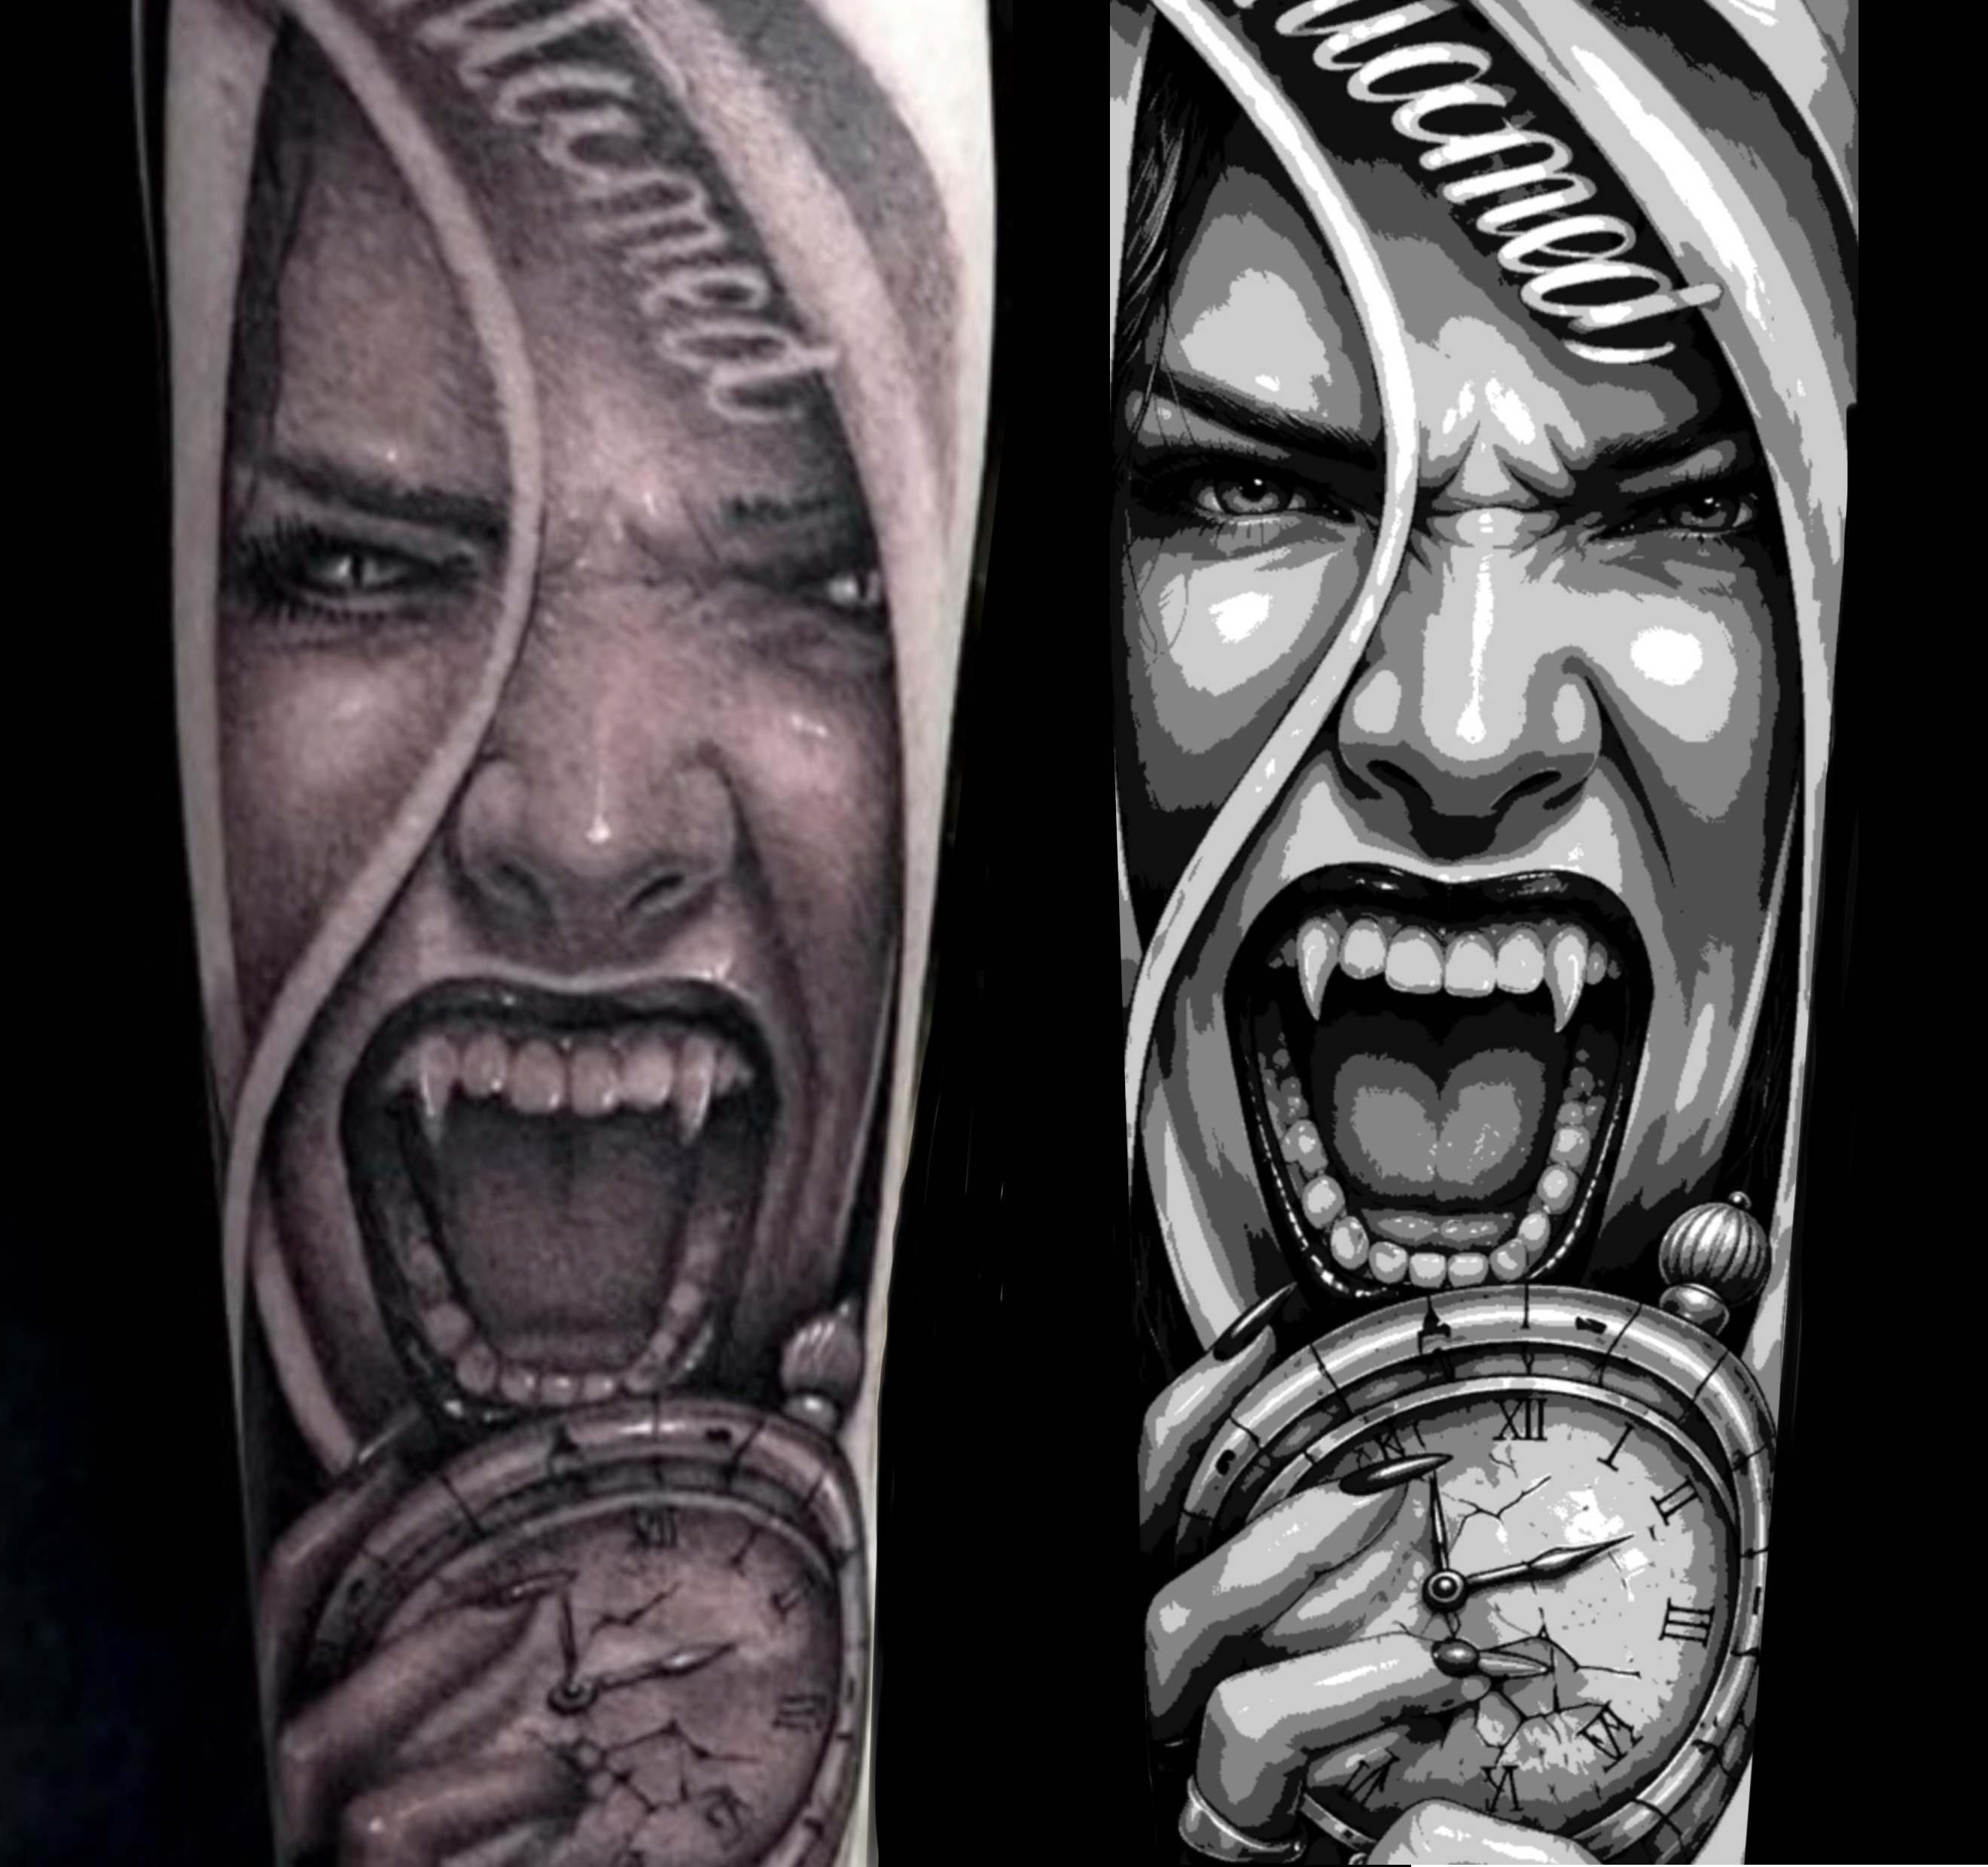
For this example, I started with a tattoo I actually executed.
It shows a screaming female face, a ribbon with the word Tomorrow, and an integrated hand and watch composition.
Next to it, I created an educational reconstruction of the same visual idea.
The reconstruction is not intended to be another finished artwork.
Its purpose is to simplify the tonal information so the value structure can be analyzed.
Real tattoo → reconstructed educational master → value analysis.
This makes it easier to see how the finished image is built from larger tonal decisions.
Why Smooth Tonal Reconstruction Helps
A reconstructed master works best for this type of analysis when the image is visually clean.
That usually means:
- smooth gradients
- limited microtexture
- limited microcontrast
- clean volumes
- continuous tonal transitions
Too much surface texture can make it harder to understand the underlying value structure.
The goal is not to manually reduce the image into six flat shades.
The goal is to let the large tonal relationships become visible.
Technique Comes After Structure
Once the value structure is clear, technique becomes extremely important.
Now questions about execution make sense.
Needle grouping.
Hand speed.
Machine response.
Grey wash.
Movement.
Skin handling.
But these answer a different question:
How do I create this value?
Value planning answers:
Where should this value go?
Understanding the difference between those two questions can make tattoo shading much easier to study.
A Simple Tattoo Shading Exercise for Beginners
Take a black-and-grey reference.
Do not think about needles yet.
Do not think about machine settings.
Instead, try to divide the image mentally into:
SKIN / 20 / 40 / 60 / 80 / 100
Then ask yourself:
What is the darkest mass?
What is the lightest mass?
Where are the midtones?
Which parts of the image should stay open?
Which transitions actually create the form?
Do not worry about making the analysis perfect.
The exercise is simply training you to see the image before trying to execute it.
Start With the Biggest Decisions
When an image feels complicated, beginners often start looking at details.
Try the opposite.
Find the largest dark area.
Then the largest light area.
Then identify the major midtone masses between them.
Only after that should you start worrying about smaller transitions.
This is very similar to the way artists have traditionally approached drawing and painting.
Structure first. Detail later.
The Principle to Remember
If you remember one idea from this article, make it this:
Before you learn how to shade, you need to know where the shading goes.
Technique determines how you place the value.
Structure determines why it belongs there.
And in tattooing, many of the most important shading decisions happen before the needle touches the skin.
Try It on Your Own Artwork
LATERAL is a visual preparation and practice tool designed to help separate tonal decisions before execution.
It is not a tattoo course.
It does not tell you how you should tattoo.
It helps you see the value structure of your own artwork more clearly.
LATERAL shows you where. You decide how.